Before taking the Software Engineering Project course, I only have experience of deploying my Django applications to Heroku, a platform as a service (PaaS) that enables developers to build, run, and operate applications entirely in the cloud. The deployment processes to Heroku are quite simple with the help of GitLab’s CI/CD. But in the Industri Pilar’s project, my team was given a private server from the faculty to deploy the development, staging, and production applications. In this sprint, I got the task to deploy the development application of Industri Pilar’s backend that uses Django and PostgreSQL. The CI/CD of the backend is not fully established yet, so I have to learn how to manually deploy the application to the private server.
Step-by-step process of the deployment
- Access the Industri Pilar’s private server by SSH to it through my faculty proxy with ProxyJump. To simplify this process, I created a configuration script to make the SSH shortcut, so that I just have to type
ssh pilarto access the private server.
~/.ssh/config
Host pilar
  HostName <server-public-ip>
  Port <server-public-port>
  User pilar
  IdentityFile /home/<user-name>/.ssh/id_rsa
  ProxyJump <proxy-name>

Host <proxy-name>
  HostName <proxy-public-ip>
  Port <proxy-public-port>
  User <user-name-faculty>
  IdentityFile /home/<user-name>/.ssh/<user-name-faculty-private-key>
Create the backend’s development directory
pilar/dev/pilar-backend.Clone the backend’s development branch in the new directory.
Create a virtual environment in the development directory, make sure that the virtual environment is activated.
Install all the dependencies from the
requirements.txt.Create the environment variables file that are needed by the backend to run.
Create the database using the PostgreSQL that is installed in the server.
Run the Django
makemigrations,migrate, andcollectstatic.Run the Django application server. Make sure that there is no error that occurred during this process.
Create a superuser in the application so that we could access the admin page later.
Create a configuration file for the Gunicorn, a Python WSGI HTTP Server for UNIX.
/etc/systemd/system/pilar-be-dev.service
[Unit]
Description=pilar-be-dev
After=network.target

[Service]
User=pilar
Group=www-data
WorkingDirectory=/opt/pilar/dev/pilar-backend
EnvironmentFile=/opt/pilar/dev/pilar-backend/.env_var
ExecStart=/opt/pilar/.pyenv/versions/3.8.5/envs/pilar-be-dev/bin/gunicorn --access-logfile - --workers 3 --bind unix:/o>

[Install]
WantedBy=multi-user.target
Restart the server with
systemctl daemon-reload, start the service, and check the service status.Create a configuration file for the NGINX.
/etc/nginx/sites-available/pilar-be-dev.conf
server {
    listen 80;
    listen [::]:80;

    server_name <server-public-ip>;

    location = /favicon.ico { access_log off; log_not_found off; }
    location /static/ {
        root /opt/pilar/dev/pilar-backend;
    }

    location / {
        proxy_pass http://unix:/opt/pilar/dev/pilar-backend/home_industry/project.sock;
        proxy_set_header Host $host;
    }
}
Bind the NGINX configuration from the sites available to the sites enabled.
Restart the server with
systemctl daemon-reload, start the NGINX service, and check the service status.
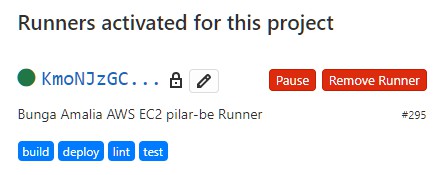
That’s it, the backend application is now alive and we can access it from the server’s public IP! We are currently developing the CI/CD so that these processes could be automated. In this sprint, I added an additional GitLab Runner for the Industri Pilar’s backend and frontend with my personal AWS EC2 server so that we don’t have to wait for the faculty shared runner if the traffic is full later. To add the runner, I just have to install Docker Engine and Gitlab Runner on my server and register the Industri Pilar’s backend GitLab project.
